Planning our daughter's 3rd Birthday was exciting for me. I wanted it to be a day she would never forget, filled with friends and family. I was inspired by the spring blooms and decided on a garden party in our back yard so there was lots of room for our large family to spread out.
I started gathering supplies early, created some simple centerpieces with pansies, plastic buckets from the dollar store and wooden garden bugs. I painted and planted three weeks ahead so they would fill in by the party. For the buffet table I painted four small wood pots, hot glued a shish kabob stick in each one, filled them with tissue paper and on the day of the party, would tape the name of the sandwich on the stick.

The sandwiches were a hit!
We prayed for sunshine but planned ahead and arranged for a couple tents. Two days before the party our daughter went with her grandparents so Rob and I could decorate. Rob blew up what seemed like a thousand balloons! The plan was to create a canopy made of green yarn with balloons, butterflies & dragonflies clipped on with cloths pegs. A magical sight for little eyes!
It became clear the day before the party that it was not going to happen as planned. Rain Rain Rain!! The outdoor garden party was going to have to take place indoors! We have a character home, the kind with lots of original details including a poor layout consisting of many rooms. Fitting 40 people in was going to be a challenge but it had to be done and we found a way.
 Bright and cheery even on a miserable day!
One game we had planned was Pin the Bee on the Flower. To CREATE the bits and pieces I used a foam board, cut out thin yellow and blue foam for the bees, used a black marker for some simple details, cut out and glued on the flower and voila! A nice alternative to the traditional.
 Super simple and lots of fun!
The next game was fishing - outdoors of course. I created some floating butterflies, dragonflies and flowers using styrofoam shapes, acrylic paint, and hot glued a magnet on each one. Thin wooden dowels with a thick plastic string attached were covered in ribbons to CREATE the rod. On the end of the plastic string I hot glued another magnet (I suggest using a strong magnet here because of the suction the water creates with the styrofoam) and wouldn't you know it made for an amazing game the kids truly enjoyed!

The tents came in handy for this one!!
Inside we had the kids table set up for making wings. Glue, glitter, foam bits, felt pens - you name it! I had purchased some thin foam sheets to cut out and CREATE simple shapes of butterflies, dragonflies, beetles and lady bugs (those last two can be the same shape ;). Once the kids had decorated them we hole punched 4 spots in the centre and added string so we could tie on some yarn and they would fit the same way a back pack would. There were kids buzzing all over the house!

Our den transformed into a craft area!!
Last but not least was the garden station where the little ones could plant some vegetables (we grew from seeds 2 month prior) and take them home for their own gardens.

Playing with dirt IN the house was so exciting for them!
I needed enough cake to feed 30 adults and 10 kids so I decided to make it from scratch... all of it. Hello!!! A three tier cake with fondant icing?? What was I thinking??? I've never made fondant before let alone a three tier cake!! It took me a combination of 12 hours over 2 days and nearly drove me to tears!

It all worked out in the end but I still stand firm... never again!!
Her wild hat... that's a whole different story!! Short version - her daddy (my manly man) got down and dirty and did some crafting with me at 1 in the morning! It was a hoot! Most importantly - she ADORED it!!
 Birthday girl & Rob... my two biggest loves!
A final note about her party. It didn't matter that we were packed in like sardines, that it rained or that some friends couldn't make it. Our house was filled with so much love and laughter it was an amazing special day for a very special little girl!


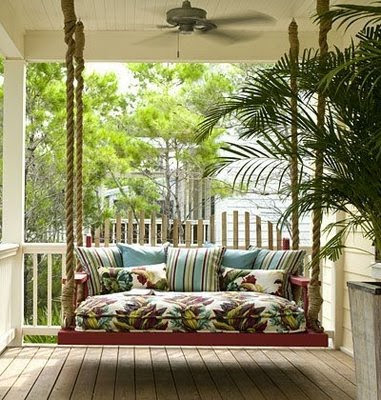 I dream of the day I too can have a porch swing large enough to sleep on!
 The perfect spot for afternoon tea with friends!


 All of the garden houses pictured here are adorable but my true inspiration comes from the one pictured below. I too would like to use old windows, doors and mouldings to give it rustic, weathered charm and warmth. White washed wood floors, crisp white linens, patch work quilts... ohhh how I wish I were there now!
  Now don't be fooled by my dream of the ultimate garden house - this is first and foremost for our daughter. The house will have an extra long support beam extending outside so it can hold the swings, slide and rings (which I plan to change into the perfect hammock area), all sorts of mini furniture (which will be replaced with flea market finds), tea party supplies (those can stay), lots of pillows (those can too), a rug (probably), books (will replace), a little wooden kitchen (gone), and what ever else she desires.


